Introduction: Why You Need an Image Compressor 🔗
In today's digital landscape, image compression is no longer optional—it's essential. Whether you're a web developer, e-commerce store owner, blogger, or social media manager, large images can significantly impact your website's performance and user experience.
Did you know that images account for over 60% of a webpage's total weight? A single uncompressed image can slow down your site by seconds, leading to higher bounce rates and lower conversions. In fact, studies show that a 1-second delay in page load time can reduce conversions by 7%.
Enter the image compressor—your secret weapon for faster websites, better SEO rankings, and improved user experience.
What is an Image Compressor? 🔗
An image compressor is a tool that reduces the file size of digital images without significantly affecting visual quality. It works by removing unnecessary data, optimizing color palettes, and applying advanced algorithms to create smaller, more efficient files.
Types of Image Compression 🔗
1. Lossy Compression 🔗
- Removes some image data permanently
- Achieves 50-90% size reduction
- Best for photographs and complex images
- Formats: JPEG, WebP
2. Lossless Compression 🔗
- Preserves all original data
- Achieves 10-30% size reduction
- Best for logos, icons, and graphics
- Formats: PNG, GIF
3. Smart Compression 🔗
- AI-powered optimization
- Analyzes image content
- Applies optimal compression per region
- Maintains quality where it matters most
Why Your Website Needs an Image Compressor 🔗
🚀 1. Faster Loading Times 🔗
Google's Core Web Vitals prioritize loading speed. Compressed images can reduce page load time by 2-5 seconds, significantly improving user experience.
📈 2. Better SEO Rankings 🔗
Google uses page speed as a ranking factor. Fast-loading pages rank higher in search results. Our image compressor helps you achieve better positions.
💰 3. Reduced Bandwidth Costs 🔗
Smaller images mean lower hosting costs. If you serve thousands of visitors monthly, compressed images can save 50-70% on bandwidth expenses.
📱 4. Improved Mobile Experience 🔗
Mobile users on limited data plans benefit from smaller file sizes. Compressed images load faster on 3G/4G connections.
🎨 5. Better User Engagement 🔗
Fast-loading pages have:
- 32% lower bounce rate
- 45% longer time on site
- 25% higher conversion rates
How to Compress Images: Step-by-Step Guide 🔗
Method 1: Using Our Free Online Image Compressor 🔗
Our free online image compressor makes image optimization simple:
Step 1: Access the Tool 🔗
Visit our Image Compressor Tool - it's completely free, no registration required.
Step 2: Upload Your Images 🔗
- Drag and drop or click to upload
- Supports JPG, PNG, WebP, GIF, and BMP
- Batch upload up to 100 images at once
- Maximum file size: 50MB per image
Step 3: Choose Compression Level 🔗
Select your preferred compression level:
- Low (70% quality) - Minimal size reduction, excellent quality
- Medium (50% quality) - Balanced size and quality (recommended)
- High (30% quality) - Maximum compression, suitable for thumbnails
Step 4: Apply Advanced Settings (Optional) 🔗
- Resize dimensions - Set max width/height
- Convert format - Transform to WebP for better compression
- Remove metadata - Strip EXIF data for additional savings
Step 5: Download Compressed Images 🔗
- Download individually or as a ZIP file
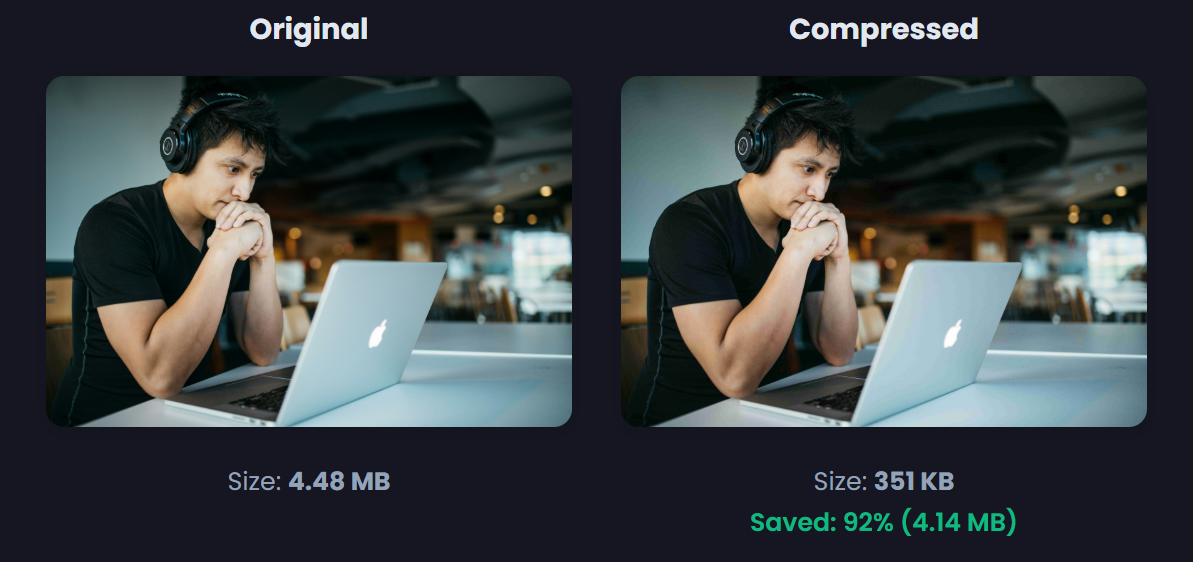
- Compare original vs compressed sizes
- See real-time compression ratio
Method 2: Manual Compression Techniques 🔗
For those who prefer manual control:
For JPEG Images: 🔗
Using ImageMagick 🔗
convert input.jpg -quality 85 output.jpg
Using Photoshop 🔗
File > Export > Save for Web > Quality 70-80%