
Table of Contents
Best Background Remover Settings for Hair and Fine Edges
Hair is the hardest thing for any background remover to handle. It's thin, irregular, semi-transparent at the tips, and often blends into whatever is behind it. Getting a clean cutout around hair isn't about finding a magic one-click setting — it's about understanding which adjustments actually affect edge quality and applying them in the right order.
The best background remover settings for hair depend on the tool you're using and the image you're processing. But the underlying principles are consistent. This guide explains what matters, what to change first, and how to verify the result before you use it.
Why Hair Breaks Background Removal Algorithms
A background remover works by classifying pixels as foreground or background. For a solid object with a clean edge — a mug, a phone, a shoe — that classification is straightforward. The boundary is sharp, the contrast is clear, and the model makes confident decisions.
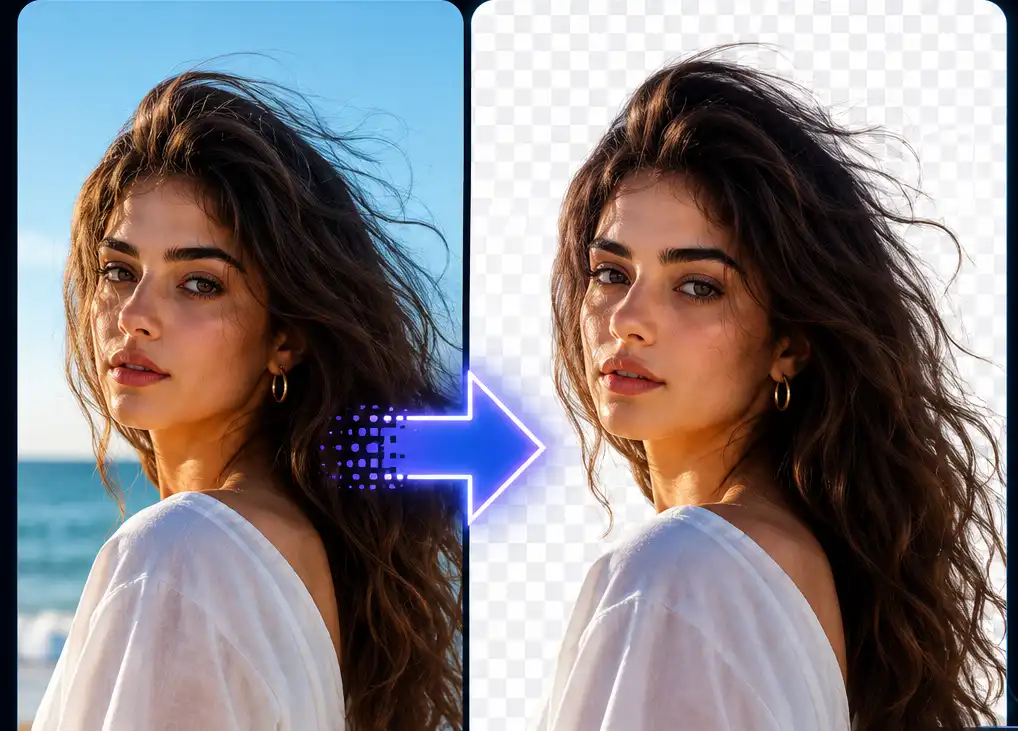
Hair destroys that confidence. A single strand of hair might be one pixel wide. Flyaway hairs are even thinner. The tips of hair are often semi-transparent, so the background color bleeds through them. If the background is dark and the hair is dark, the model can't tell where one ends and the other begins.
This is why generic background removal produces the classic "helmet head" effect: the model cuts off all the loose, wispy hair because it's uncertain about those pixels. The result is a hard, unnatural edge that looks like the person is wearing a hair-shaped cap.
Fine edges on non-hair subjects — fur, fabric fringe, plant leaves, a mesh chair — create the same problem for the same reason. The model can't resolve sub-pixel details or semi-transparent boundaries, so it makes a conservative cut and sacrifices the fine structure.
The Settings That Actually Matter for Fine Edges
Most online background removers don't expose much in the way of manual settings. They process the image automatically and give you the result. But several factors act as de facto settings — variables you control before and after processing that directly affect edge quality.
Source resolution. This is the biggest one. Higher resolution gives the model more pixels to work with at the edge. A 4000-pixel-wide image has far more edge detail than a 1000-pixel-wide image. If you're working with a low-resolution source, upscaling it won't help — the detail simply isn't there. Start with the largest original file you can find.
Contrast between hair and background. The model needs a visible difference between the hair color and the background color. Dark hair on a white background is easy. Dark hair on a dark gray background is nearly impossible. If the original image has low contrast, adjusting brightness and contrast before uploading can improve the result significantly.
Background uniformity. A plain, solid background gives the model a clear reference. A busy background — a patterned wall, a cluttered room, foliage — introduces competing edges that confuse the classification. When possible, choose or capture images with clean backgrounds if you know you'll need to remove them later.
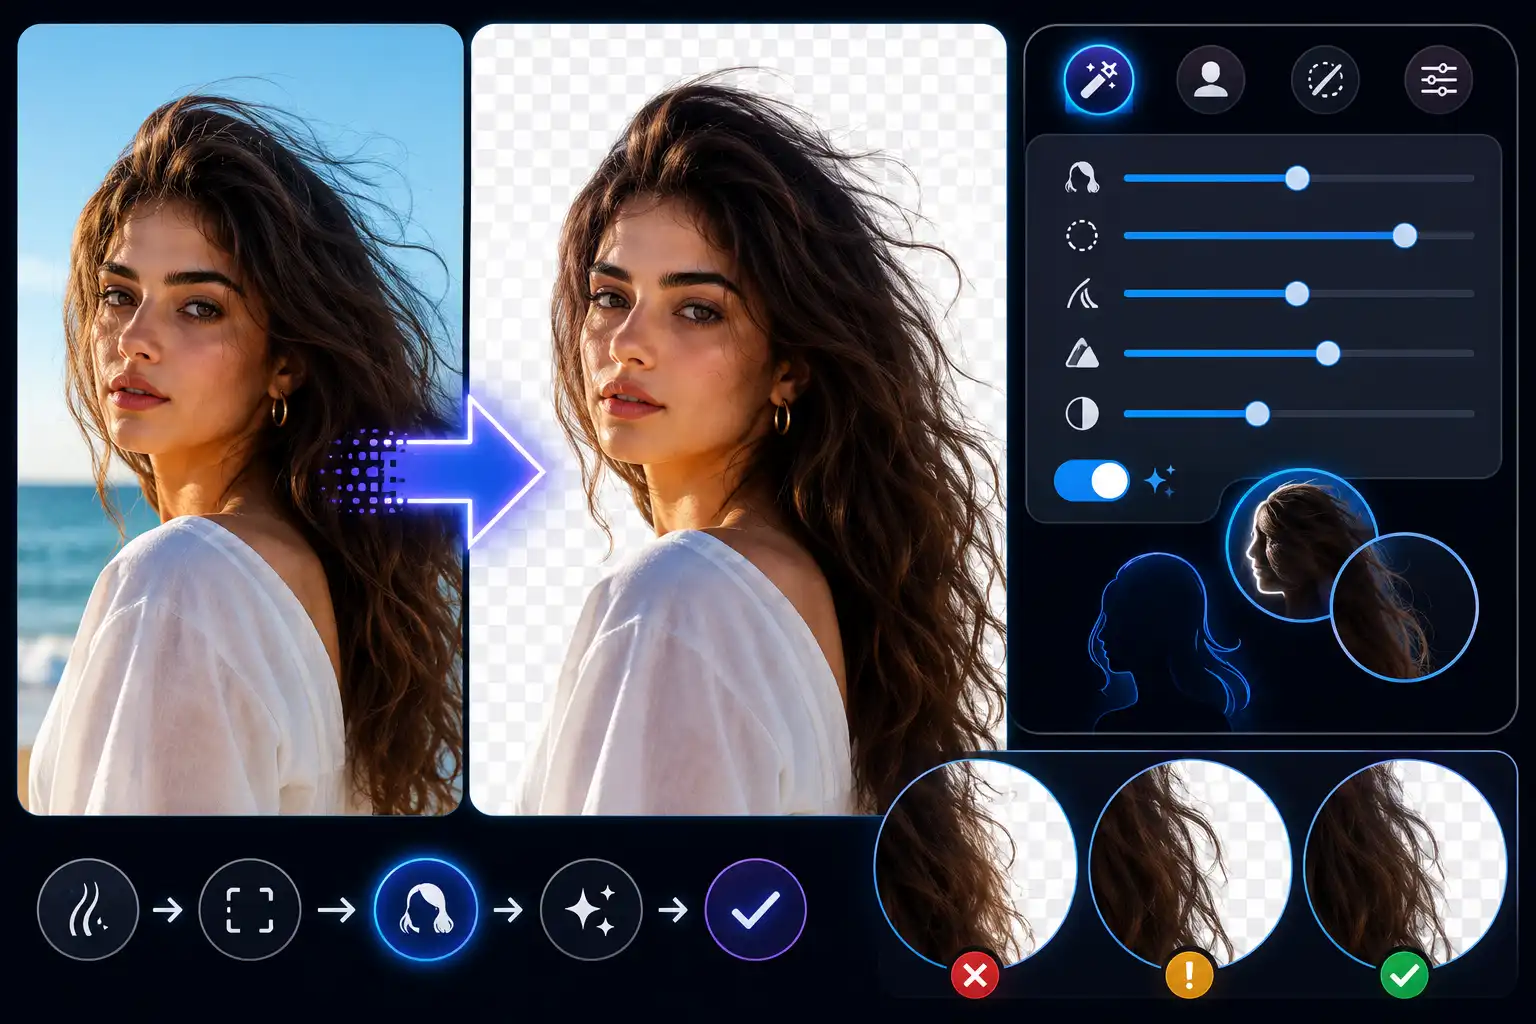
Edge refinement or smoothing settings. Some tools include a refinement step that softens the transition between foreground and background. If your tool has an option to adjust edge hardness, feathering, or smoothing, start with a modest setting and check the result. Too much smoothing smears fine hair into a blur. Too little leaves jagged edges.
Manual touch-up tools. Many online removers now include a manual brush or eraser that lets you paint areas to restore or remove. For hair, this is often the difference between an acceptable cutout and a professional one. After automatic processing, zoom in and use the manual tool to bring back wisps of hair the model erased or to remove background fragments it left behind.
A Practical Workflow for Hair and Fine Edges
Instead of hunting for a single perfect setting, use a sequence that progressively improves the result. Here's the workflow that works most reliably across different tools.
1. Find the highest-quality source. Look for the original file, not a compressed copy or screenshot. Check cloud backups, email attachments, or the original camera roll. A RAW or high-resolution JPEG gives the model far more edge data than a social media download.
2. Improve contrast before uploading. If the hair and background are close in tone, open the image in any basic editor and increase contrast or adjust levels. Push the background away from the hair color. Even a small adjustment can sharpen the model's decision boundary.
3. Run the automatic removal. Use a capable background remover to process the image. Don't expect perfection on the first pass — expect a rough cut that handles the easy parts and struggles with the fine edges.
4. Zoom in and assess. Magnify to at least 200%, ideally 400%. Look at the hairline, the flyaways, and any area where the subject meets the background. Identify what the model got wrong: missing hair, remaining background, or a harsh edge.
5. Use manual touch-up if available. If your tool has a restore/erase brush, use it to fix the problem areas. Paint back strands of hair that vanished. Erase leftover background between hair sections. This step takes a few minutes but transforms a mediocre cutout into a usable one.
6. Test on multiple backgrounds. Place the transparent result on white, black, and a mid-tone color. A dark fringe shows up on white; a light fringe shows up on black. If the edge looks clean on both extremes, it's likely clean everywhere.
For a tool that handles the automatic processing cleanly, you can start with the MiniToolsPro background remover and then apply manual refinements where the hair needs it.
How Different Background Types Affect Hair Edges
The background you're removing has as much impact on the result as the hair itself. Here's how the common scenarios play out.
| Background Type | Expected Result | What to Do |
|---|---|---|
| Solid white or light gray | Good if hair is dark; moderate if hair is blonde or light | Increase contrast if hair blends into background |
| Solid black or dark | Good if hair is light; poor if hair is dark | Brighten hair slightly or adjust levels before processing |
| Busy or patterned | Poor — model confuses background elements with hair | Use manual touch-up extensively or choose another image |
| Outdoor with bokeh | Moderate — bokeh can look like soft edge detail | Expect manual cleanup around hair |
| Gradient or studio backdrop | Moderate to good depending on contrast | Increase contrast at the hairline before processing |
The pattern is consistent: contrast and background simplicity determine how much manual work you'll do afterward. A high-contrast, uniform background lets the automatic tool handle most of the job. A low-contrast or busy background guarantees manual cleanup.
The Limitations You Can't Fix With Settings
Some problems aren't settings problems. They're physics and information problems. Recognizing them saves you from chasing a perfect result that isn't achievable.
Motion blur. If the hair is blurred because the subject was moving, the edge information is permanently smeared across multiple pixels. No setting can recover detail that was never captured. The best you can do is smooth the edge and accept that fine strands won't be visible.
Extreme low resolution. A 400-pixel-wide photo has almost no hair detail to preserve. Every strand is a pixel or less. The result will look blocky no matter what you do. The only real fix is a better source image.
Hair that exactly matches the background color. If a person with jet-black hair is photographed against a black background, the edge simply doesn't exist in the image data. The model can't find what isn't there. You'd need to re-shoot or manually paint an artificial edge — which almost never looks right.
Semi-transparent objects. Hair tips, veils, smoke, and glass all share this issue. The pixels genuinely contain a mixture of foreground and background color. A perfect cutout would require preserving that semi-transparency, which most automated tools only approximate. The result is usually a compromise.
Manual Cleanup Techniques That Make the Difference
If your background remover includes manual refinement tools, use them. If it doesn't, you may need a second tool for the cleanup pass. Either way, these are the techniques that consistently improve hair edges.
Restore missing flyaways. Use a small brush to paint back thin strands the model removed. Work at high zoom. Short, overlapping strokes follow the natural direction of the hair. Don't try to restore every strand — a few well-placed strokes suggest texture without looking artificial.
Erase background fragments. Between hair sections and inside curls, the model may leave small pockets of background. A small eraser brush removes these cleanly. Zoom to 300% or more so you can see exactly what you're deleting.
Feather the edge. A hard edge looks like a cutout. A feathered edge — where the transition happens over a few pixels instead of one — looks more natural. If your tool has a feather or soften option, apply it lightly after manual cleanup. Too much feathering blurs the hair into a fog.
Use layer masking in a full editor. If you have access to Photoshop, GIMP, or Photopea, you can load the automatic result and refine the mask manually. A soft brush on the mask at 20–30% opacity rebuilds semi-transparent hair tips better than most automated tools can. This is the professional-standard method for difficult hair.
When to Stop Refining
It's easy to fall into a loop of endless micro-adjustments. At some point, the improvement stops being worth the time.
Ask yourself three questions:
- Where will this image actually appear?
- At what size will people see it?
- How much detail will be visible at that size?
A headshot that will appear as a 150-pixel avatar doesn't need the same edge quality as a full-page magazine spread. Most digital uses — social profile pictures, website team pages, e-commerce product shots — are displayed at sizes where minor edge imperfections are invisible.
If the result looks clean at the size it will actually be used, stop. You're done. The remaining flaws only exist at zoom levels your audience will never see.
Formats and Export Settings for Edge Quality
The file format you choose affects how the fine edges are preserved.
PNG is the default for background-removed images. It supports full alpha transparency, which means those semi-transparent hair pixels are preserved. Don't convert to JPEG — JPEG has no alpha channel and will flatten every transparent pixel to a solid color, destroying the hair edge you worked to preserve.
WebP also supports transparency and produces smaller files. It's a good choice for web use if you need faster loading and don't need maximum compatibility with older tools.
If the PNG file size is large, compress it with an image compressor before uploading it to a website. Compression reduces file size but should not visibly affect edge quality if done at a reasonable level.
If you need the image at specific pixel dimensions — for example, a 400×400 avatar — use an image resizer after background removal. Resizing down from a high-resolution source sharpens the appearance and hides minor edge flaws.
Why AI Struggles With Fine Edges
Hair and other fine details can be difficult to separate because they often blend into the original background. Understanding how AI background removal actually works makes it easier to understand why some edges need additional adjustment.
Frequently Asked Questions
Can I get perfect hair edges with a free background remover?
For most images with good contrast and a clean background, a free online tool can produce a very usable result. "Perfect" — meaning every individual strand preserved — usually requires manual refinement in a full editor. But for most digital uses, the automatic result plus a small manual touch-up is more than sufficient.
What's the best background color for hair removal?
A solid color that contrasts strongly with the hair. Dark hair works best on white or light backgrounds. Light or blonde hair works best on dark backgrounds. Avoid backgrounds that match the hair color or contain busy patterns.
Why does my hair look blurry after background removal?
Usually because the tool applied edge smoothing or feathering, or because the original image had soft focus at the hairline. If your tool has an edge hardness or smoothing setting, reduce it and reprocess. If the blur is in the source image, no setting can recover the missing detail.
Should I remove the background before or after editing the photo?
Remove it after basic edits like exposure and color correction but before final resizing. Correcting contrast and brightness first gives the removal tool a cleaner signal. Resizing last preserves maximum edge detail during processing.
Do manual touch-up brushes really make a difference?
Yes, especially for hair. The automatic result is a starting point. A few minutes with a small brush can restore missing strands, erase background fragments, and transform a rough cutout into something that looks professionally done.
Work With the Edge, Not Against It
Hair and fine edges will always be the hardest part of background removal. The tools are better than they used to be, but they're still making educated guesses about pixels that don't have a clear answer.
The best background remover settings for hair aren't a hidden menu. They're the choices you make before and after processing: the source quality, the contrast, the background type, the manual touch-up, and the export format. Control those variables, check your result at realistic size, and stop when it's good enough for where it will actually appear.
Start the process with the MiniToolsPro background remover to handle the automatic cut, then refine the edges where the hair needs help. The combination gets you closer to a clean result than either step alone.
If you're still getting unwanted background areas after adjusting the settings, it can help to go back to the basic removal process and check the source image. Our guide to removing an image background online covers the complete workflow from start to finish.
Share this article 👇



0 Comments