

Table of Contents
Product photos with clean, consistent backgrounds sell more. A background remover for product images isolates your item from distracting surroundings and lets you place it on white, transparent, or branded backgrounds. For e-commerce sellers, this isn't just a nice-to-have — it's often a marketplace requirement.
This guide explains why background removal matters for product photography, how to get clean results with free online tools, and how to build a workflow that scales across your entire catalog.
Why Product Photos Need Background Removal
Marketplaces like Amazon, eBay, Etsy, and Shopify stores all benefit from consistent product presentation. When every product photo shares the same clean background, your store looks professional and trustworthy. Shoppers focus on the product itself rather than the clutter behind it.
Amazon's product image requirements, for example, specify that main images must have a pure white background. Sellers who upload photos with busy backgrounds risk having listings suppressed or rejected. Even on platforms without strict requirements, clean backgrounds improve click-through rates and conversion.
Beyond compliance, background removal gives you flexibility. A product isolated on a transparent background can be placed on seasonal promotions, category banners, social media posts, and email campaigns without re-shooting the product. You shoot once and reuse the asset everywhere.
How Background Removal Works for Product Photos
Modern background removal tools use machine learning models trained on millions of product images. These models recognize the difference between foreground objects and backgrounds, even when the product has complex edges, shadows, or reflections.
The process for product photos follows the same steps as general background removal:
- Upload the product image.
- The tool detects the product as the foreground subject.
- A mask is created separating the product from the background.
- The background is removed or made transparent.
- You download a transparent PNG ready for use.
What makes product photography different from other uses is the need for consistency. Every product in your catalog should have the same background treatment. Whether you're processing 10 products or 1,000, the output should look uniform.
Preparing Product Photos for Background Removal
The quality of your source image directly determines the quality of the background removal. Here's what to focus on before you upload anything.
Lighting
Even, diffused lighting reduces harsh shadows and makes it easier for the tool to distinguish product from background. Avoid dramatic shadows, which can confuse the algorithm and leave gray smudges around the product.
Contrast
Your product should visually stand out from the background. A white mug on a white background is harder to process than the same mug on a light gray or colored surface. If you control the photography, shoot products against a contrasting background when possible.
Focus
Sharp focus throughout the product is essential. Blurry edges make it harder for the tool to define the boundary between product and background. Use a tripod or stable surface when shooting.
Single product per image
Background removal tools work best with one product per image. Group shots with multiple products confuse the algorithm and often require manual cleanup. Shoot each product separately for the cleanest results.
Step-by-Step Workflow for E-commerce Product Photos
Step 1: Shoot or collect your product images
Start with the best source images you can get. If you're shooting new photos, follow the preparation tips above. If you're working with existing photos, select the sharpest, best-lit versions available.
Step 2: Remove the background
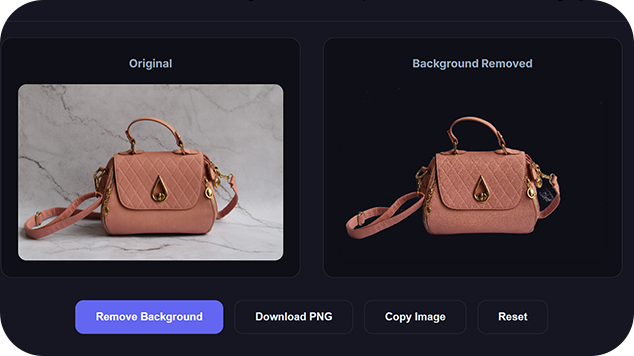
Use a background remover for product photos to isolate each item. The tool processes the image automatically and returns a transparent PNG in seconds.
Step 3: Review at full size
Zoom in and check the edges. Look for background remnants around the product outline, especially in areas with fine detail like jewelry, fabric texture, or product logos. If the result isn't clean, try a different source image or manually clean the edges.
Step 4: Place on the required background
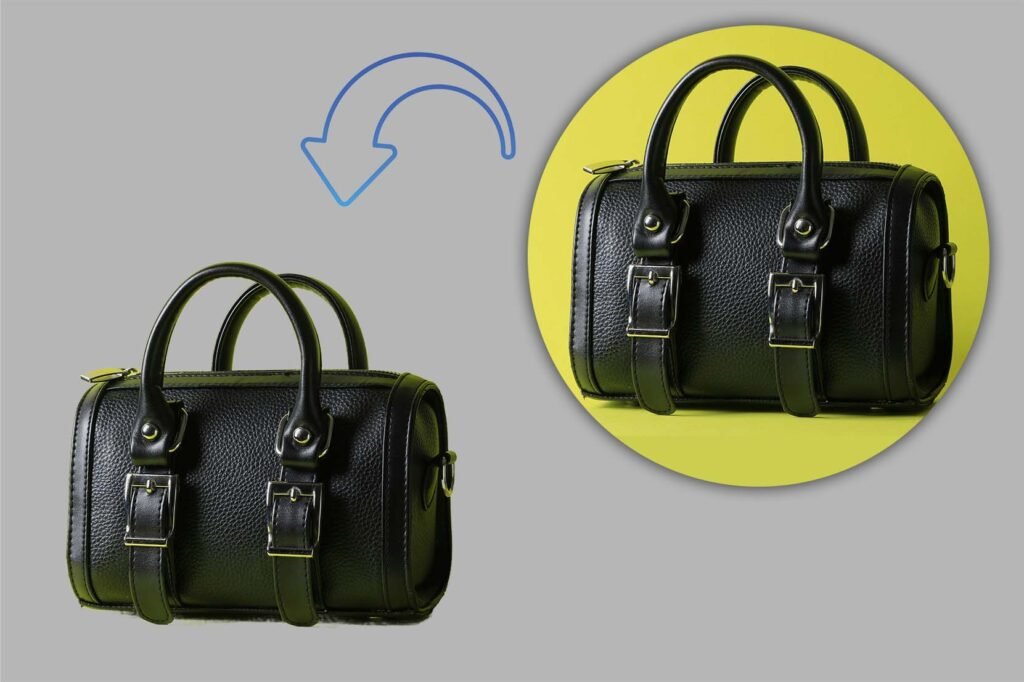
For Amazon and most marketplaces, place the product on a pure white background (#FFFFFF). For your own website or social media, you can use white, transparent, or a branded background depending on your design system.
Step 5: Optimize the file
After background removal, compress the image to reduce file size without visible quality loss. Also resize the image if it's larger than the platform requires. Most marketplaces recommend images between 1000 and 2000 pixels on the longest side.
Step 6: Save and organize
Keep the transparent PNG as your master file. Create platform-specific versions from this master — white background JPGs for Amazon, WebP files for your website, and smaller PNGs for social media. Organize by product SKU or name so you can find assets quickly.
Common Product Photo Challenges
White products on white backgrounds
White products are notoriously difficult because the tool can't easily distinguish product from background. If you're shooting new photos, use a light gray background instead. If you're working with existing photos, you may need manual cleanup after automatic processing.
Reflective or transparent products
Glass, jewelry, and reflective surfaces confuse background removal algorithms. Reflections and transparency make it hard to define where the product ends and the background begins. Shoot these products on solid, contrasting backgrounds and expect to do some manual refinement.
Products with fine details
Items like jewelry chains, fabric fringe, or detailed carvings have intricate edges that automatic tools may partially remove. Check these areas carefully at full zoom and clean up manually if needed.
Shadows and gradients
Natural shadows under products can be mistaken for part of the product or left as gray smudges. If you want a natural shadow effect, it's often better to remove the background completely and add a synthetic shadow in your design tool.
Consistency Across Your Catalog
Consistency matters more than perfection. A catalog where every product photo has a clean white background and consistent framing looks professional even if individual images have minor imperfections. The opposite — some products on white, some on gray, some with busy backgrounds — undermines trust and makes your store look disorganized.
Create a simple style guide for your product images:
- Background color: pure white or transparent, applied consistently
- Product sizing: consistent proportion of product to frame
- Padding: equal space around all sides of the product
- File format: PNG for transparent, JPG or WebP for white background
- Resolution: consistent pixel dimensions across all products
Apply these standards to every image you process, and your catalog will look cohesive regardless of how many products you sell.
Bulk Processing for Large Catalogs
If you have dozens or hundreds of products, processing each image individually becomes tedious. While background removal typically requires individual attention for quality control, you can streamline other steps:
- Batch resize all product images to consistent dimensions.
- Batch compress images to optimize file sizes.
- Use a consistent naming convention for files.
- Apply the same background treatment to every image.
For the compression step, a bulk image compressor processes multiple files at once. This saves significant time when preparing a large catalog for upload.
Platform-Specific Requirements
Amazon
Main product images must have a pure white background. The product should fill at least 85% of the frame. Minimum resolution is typically 1000 pixels on the longest side, though larger is better for the zoom feature.
eBay
eBay recommends a white or light gray background for main photos. The product should fill most of the frame. Minimum resolution is 500 pixels on the longest side, with 1600 pixels recommended.
Etsy
Etsy is more flexible about backgrounds. Lifestyle shots with natural backgrounds perform well, but many sellers use clean product-only images for the main photo. A consistent treatment across your shop builds brand recognition.
Shopify and other platforms
Your own website gives you the most flexibility. You can use white backgrounds, transparent PNGs, lifestyle shots, or branded backgrounds. Consistency is more important than any specific background choice.
Frequently Asked Questions
Can I use a free background remover for product photos?
Yes. Free online tools handle most product photos well, especially items with clear edges and good contrast. Complex products like jewelry or transparent items may require additional manual cleanup.
What background should I use for Amazon product photos?
Amazon requires pure white (#FFFFFF) for main product images. Remove the original background and place the product on pure white before uploading.
Should I download as PNG or JPG?
Download as PNG if you need transparency. For marketplace uploads that require a white background, place the product on white and export as JPG. PNG files with transparency are useful for your own website and design work.
How do I handle shadows in product photos?
Remove the original shadow from the background. If you want a shadow effect, add a synthetic drop shadow in a design tool after placing the product on a new background. This gives you more control than keeping the original shadow.
Can I process multiple product photos at once?
Background removal typically works best on one image at a time for quality control. However, you can speed up the workflow by batching other steps like compression and resizing after background removal is complete.
Why does my product look jagged after background removal?
Jagged edges occur when the tool struggles to define the boundary between product and background. Improve the source image with better lighting and contrast, or manually smooth edges in a design tool after automatic removal.
What Background Should Product Photos Use?
Removing the background is only the first step. You also need to choose the right final format for your product image. A transparent PNG or white background can work better depending on where the image will be used.
Building a Repeatable Process
Background removal for product photos is a skill that improves with repetition. Start with good source images, use a reliable background remover for product images, and follow a consistent post-processing workflow. Check your results at full size before uploading, and keep your transparent PNGs as master files for future flexibility.
The time you invest in building this process pays off across every product you sell. Clean, consistent product photos improve buyer confidence, reduce returns, and make your store look professional from the first click.
Products with thin handles, fabric, fur, or other complicated edges can be harder to cut out cleanly. In these cases, adjusting the background remover settings for hair and fine edges can help produce a more natural-looking result.
Share this article 👇



0 Comments