
Table of Contents
That perfect product photo you spent an hour lighting and styling? It's 12 megabytes. Upload it to your website and watch your page speed plummet, your bounce rate climb, and your visitors grow impatient. The problem is painfully common, but the solution doesn't require sacrificing the visual quality you worked so hard to achieve.
Learning how to reduce image size without losing quality comes down to mastering a few core techniques: choosing the right format, applying appropriate compression, and understanding what the human eye can and cannot perceive. This guide will teach you the principles behind every effective optimization workflow, empowering you to make informed decisions about every image you publish.
What Does It Mean to Reduce Image Size Without Losing Quality?
Featured Snippet: Reducing image size without losing quality means shrinking a file's byte count through compression algorithms and format selection while maintaining visual fidelity. The human eye cannot distinguish a properly compressed 200KB WebP photo from the original 5MB RAW file at standard viewing distances.
The phrase itself can cause confusion. In strict technical terms, any file reduction involves removing something. The distinction is what gets removed.
Lossless Methods
Lossless methods reorganize data more efficiently, preserving every single pixel of information. The file is smaller, but every original detail remains intact.
Perceptually Lossless Methods
Perceptually lossless methods discard color nuances and brightness variations that fall below the threshold of human perception. You lose data on paper, but your eyes never register the difference. A product photo compressed from 5MB to 200KB can look identical to customers browsing your store. That's the target.
This distinction—between what the file contains and what the viewer perceives—is the foundation of intelligent image optimization. Throughout this guide, we'll explore how to exploit this gap to reduce file sizes while delivering an indistinguishable visual experience dramatically.
Why Image Size Matters
Featured Snippet: Oversized images are the number one cause of slow websites. They increase load times, consume mobile data, hurt SEO rankings through poor Core Web Vitals, and directly reduce ecommerce conversion rates.
Every kilobyte you force a visitor to download chips away at their patience. The impact cascades across every aspect of your digital presence.
Website Speed
Images typically account for 50% to 75% of a webpage's total weight. A handful of unoptimized photos can add 20MB of data transfer before a single word of text renders. That's the difference between a page that loads instantly and one that feels like waiting for a dial-up connection.
SEO and Core Web Vitals
Largest Contentful Paint (LCP) measures how quickly the main content loads. Bloated hero images are almost always the bottleneck. Google uses this metric as a direct ranking signal. Pages that pass Core Web Vitals consistently outrank slower competitors, regardless of content quality.
Mobile Performance
Mobile users often browse on inconsistent connections. A 10MB image that loads instantly on office Wi-Fi becomes a frustrating experience over 4G, burning through data caps. Over 60% of web traffic now comes from mobile devices. Optimizing for these users isn't optional—it's essential.
Bandwidth and Storage
Hosting providers charge for bandwidth and server space. Reducing image payloads by 60% directly lowers your monthly infrastructure costs. For high-traffic sites, these savings can amount to thousands of dollars annually.
User Experience and Conversions
Slow-loading product images create friction. Research from Google shows that the probability of a visitor bouncing increases by 32% when page load time goes from one second to three seconds. A study by Portent found that sites loading in 0-4 seconds achieve the highest conversion rates. Every second beyond that erodes trust and revenue.
Understanding Image Compression
Featured Snippet: Image compression works by identifying and eliminating redundant data inside a file. Algorithms analyze pixel patterns, remove invisible metadata, and apply mathematical transforms to represent visual information with fewer bytes.
To compress effectively, you need to understand what's inside an image file and where the waste hides.
Two Categories of Data
1. Pixel Data
Records the color value of every dot in the image grid. A 4000×3000 pixel photo contains twelve million individual pixels. Each pixel requires multiple bytes for its red, green, and blue channels, so the raw data alone can exceed 30MB.
2. Metadata
Hidden text information attached to the file. Your camera embeds:
- Make, model, and lens type
- Focal length and exposure settings
- GPS coordinates
- Timestamp
- Embedded preview thumbnail
This invisible baggage often consumes 200 to 500 kilobytes on a single photo. For a product image on an online store, none of this information serves any purpose.
How Compression Works
Compression algorithms attack pixel data through pattern recognition. A block of solid blue sky contains hundreds of pixels with near-identical color values. Instead of storing each one individually, the algorithm stores one value and a note to repeat it.
Advanced techniques like the Discrete Cosine Transform (used in JPEG) analyze frequency patterns in the image. High-frequency details (sharp edges, fine textures) require more data to represent accurately. Low-frequency areas (smooth gradients, solid colors) can be simplified aggressively without noticeable degradation.
This is why a photo of a clear sky compresses far more efficiently than a photo of a crowded city street. The sky has less visual complexity, so there's more redundancy to exploit.
Lossy vs Lossless Compression
Featured Snippet: Lossless compression perfectly preserves all original data and can be reversed completely. Lossy compression permanently discards selected information to achieve significantly smaller files, relying on the limitations of human vision to hide the missing data.
Choosing between these two approaches defines your entire optimization strategy. Understanding their differences is essential.
Lossless Compression
Lossless compression rewrites the internal code of a file without discarding any pixel data. Think of it like folding a map neatly instead of cutting pieces off. The map remains complete.
How it works:
- Indexing colors to create a more efficient palette
- Predicting pixel values based on neighbors
- Encoding repeating patterns with shorter symbols
Formats like PNG use lossless compression exclusively.
The advantage: Perfect fidelity. A screenshot of text or a logo with sharp edges remains razor-crisp.
The limitation: Modest file size reduction, typically between 10% and 30%. A 1MB PNG logo might compress down to 800KB but rarely further.
Lossy Compression
Lossy compression accepts permanent data deletion in exchange for dramatic size reductions. The algorithms exploit a biological fact: human eyes perceive changes in brightness with far greater sensitivity than changes in color. This is why you can spot a flickering light instantly but struggle to distinguish subtle shade variations.
How it works:
- Prioritizes luminance data (brightness)
- Aggressively simplifies chrominance information (color)
- Removes high-frequency detail that blends together at normal viewing distances
The result is a file that can be 50% to 80% smaller than the original with zero visible quality loss to a casual observer. JPEG, lossy WebP, and lossy AVIF all use variations of this approach.
The advantage: Dramatic file size reduction.
The limitation: Data is permanently discarded. Each subsequent save degrades quality further.
Lossy vs Lossless Comparison Table
| Feature | Lossless Compression | Lossy Compression |
|---|---|---|
| Data Integrity | Original data fully recoverable | Data permanently deleted |
| Compression Ratio | Low (10-30% reduction) | High (50-90% reduction) |
| Visual Quality | Identical to source | Indistinguishable to significantly degraded |
| Best Formats | PNG, Lossless WebP, Lossless AVIF | JPEG, Lossy WebP, Lossy AVIF |
| Ideal Use Case | Logos, screenshots, diagrams, text graphics | Photographs, gradients, web imagery |
Best Ways to Reduce Image Size Without Losing Quality
Featured Snippet: The most effective workflow combines three actions: resizing images to exact display dimensions, converting to next-generation formats like WebP or AVIF, and applying perceptually lossless compression at optimized quality settings.
No single button solves every scenario. A professional approach applies multiple techniques in sequence, each targeting a different source of file bloat.
1. Resize to Exact Display Dimensions
The single largest mistake in web image handling is uploading a 6000-pixel-wide photograph and using HTML or CSS to display it at 300 pixels wide. The browser still downloads the full 6000-pixel file, wasting bandwidth on pixels that will never reach the screen.
Always resample the image to the precise maximum width your website renders:
- Blog content areas: Typically 800-1200 pixels wide
- Product zoom features: May need 2000+ pixels
- Hero images: Usually 1600-1920 pixels wide
- Thumbnails: 150-300 pixels wide
Measure your actual requirements and resize accordingly before compression even begins.
2. Select the Correct File Format
Different image content demands different formats. Saving a photograph as a PNG creates a file five to ten times larger than a JPEG at equivalent visual quality. Saving a logo with text as a JPEG introduces fuzzy compression artifacts around the letters.
Run through this mental checklist:
- Photograph with complex colors: JPEG, lossy WebP, or lossy AVIF
- Graphic with text, sharp lines, or transparency: PNG or lossless WebP
- Simple icon or logo: SVG vector format whenever possible
- Animated content: Animated WebP or silent MP4 (not GIF)
3. Convert JPEG to WebP
WebP delivers 25% to 35% smaller files than JPEG at the same visual quality level. The format supports both lossy and lossless modes, plus alpha transparency.
Real-world example: A typical product photo weighing 350KB as a JPEG often shrinks to around 230KB after WebP conversion with no visible degradation.
Browser support: Over 97% of global users now access the web with WebP-compatible browsers. The format is ready for mainstream adoption.
4. Convert PNG to WebP
Transparent PNGs used for logos and badges are notorious for large file sizes. A lossless WebP version of the same graphic typically reduces file size by 40% to 60% while preserving the exact same pixel data and transparency channel.
Real-world example: A 500KB PNG logo often becomes a 200KB WebP file—identical visual quality, less than half the size.
5. Use AVIF for Maximum Efficiency
AVIF offers the best compression efficiency currently available for web delivery. High-resolution photographs can be 50% smaller than JPEG equivalents at matching visual quality.
Advantages over other formats:
- Handles gradients and smooth color transitions without banding
- Supports HDR and wide color gamut
- Better texture preservation at low bitrates
Current limitation: Slightly slower encoding speed and less universal browser support than WebP, though adoption is rapidly growing.
6. Strip Metadata Completely
Camera metadata serves photographers during post-processing but adds useless weight on the web.
What to remove:
- EXIF data (camera settings, serial numbers)
- GPS coordinates (privacy risk)
- Embedded color profiles
- Preview thumbnails (duplicates of the main image)
- Copyright information (if already visible elsewhere)
These can occupy hundreds of kilobytes on a single photo. A dedicated metadata scrubber removes this invisible text layer automatically, reducing file size without any visual impact.
7. Tune Quality Settings Precisely
Avoid blindly using default quality sliders. Most tools default to 90% or higher, producing files far larger than necessary.
The sweet spot: The visual quality of a JPEG or WebP plateaus around 80% to 85%. The difference between 100% and 85% quality is visually imperceptible but can halve the file size.
Testing methodology:
- Export your image at 70% quality
- View it at 100% on your display
- Check for artifacts (blocking, blurring, color shifts)
- If none visible, try 60%
- When you detect artifacts, increase quality by 5% for a safe margin
This approach ensures you're not wasting bytes on quality your viewers can't perceive.
8. Implement Responsive Images
Delivering a 1600-pixel desktop hero image to a 375-pixel mobile screen wastes significant bandwidth.
Use the srcset attribute to serve appropriately sized versions:
<img src="hero-800.jpg"
     srcset="hero-400.jpg 400w,
             hero-800.jpg 800w,
             hero-1600.jpg 1600w"
     sizes="(max-width: 600px) 400px,
            (max-width: 1200px) 800px,
            1600px"
     alt="Descriptive text">
This ensures mobile users download only what they need while desktop users get high-resolution versions.
9. Apply Lazy Loading
Images below the initial viewport don't need to load immediately. Adding loading="lazy" delays loading until the user scrolls near the image:
<img src="image.jpg" loading="lazy" alt="Description">
This reduces initial page weight and speeds up the critical rendering path.
10. Combine Techniques for Maximum Impact
The most effective approach isn't choosing one technique—it's applying them all in sequence:
- Preserve a lossless master copy (PNG or TIFF)
- Resize to exact display dimensions
- Convert to WebP or AVIF format
- Compress at 80-85% quality
- Strip all metadata
- Generate responsive variants with srcset
- Apply lazy loading
- Test with PageSpeed Insights
Best Image Formats Explained
Format selection is a strategic decision based on image content. No single format is universally superior.
JPEG
Strengths:
- Universal compatibility across all devices and browsers
- Excellent compression for photographs
- Smooth handling of color gradients
Weaknesses:
- No transparency support
- Visible blocking artifacts at high compression
- Degrades with repeated saves
Ideal Uses: Blog photos, hero images, product photography, social media previews
File Size: Baseline (largest among modern formats)
PNG
Strengths:
- Lossless compression preserves perfect quality
- Sharp text rendering
- Full alpha transparency
Weaknesses:
- Very large file sizes for photographs
- No lossy mode
- Not ideal for complex images
Ideal Uses: Logos, icons, screenshots, diagrams, graphics with sharp edges
File Size: Very large for photographs (can be 5-10x JPEG)
WebP
Strengths:
- Supports both lossy and lossless modes
- Transparency support
- Animation support
- 25-35% smaller than equivalent JPEG or PNG files
- 97%+ global browser support
Weaknesses:
- Older browser versions lack support (though coverage is excellent)
- Slightly slower encoding than JPEG
Ideal Uses: The default choice for all web images on modern websites
File Size: ~30% smaller than JPEG; 40-60% smaller than PNG
AVIF
Strengths:
- Best compression efficiency available
- Supports HDR and wide color gamut
- Handles gradients flawlessly (no banding)
- Excellent texture preservation
Weaknesses:
- Slower encoding speed
- Slightly less universal browser support than WebP
- Requires newer browsers
Ideal Uses: Photography portfolios, high-fidelity product images, anywhere quality and file size must both be optimized
File Size: ~50% smaller than JPEG
GIF
Strengths:
- Universal animation support
- Simple playback everywhere
Weaknesses:
- Limited to 256 colors
- Huge file sizes for video content
- Grainy dithering
- Very old, inefficient format
Ideal Uses: Legacy animated content only. Animated WebP or silent MP4 are vastly superior alternatives.
File Size: Very large compared to modern alternatives
SVG
Strengths:
- Mathematical vector format
- Infinite scaling without quality loss
- Tiny file sizes for simple shapes
- CSS stylable
Weaknesses:
- Cannot represent photographs
- Complex paths increase file size
- Not suitable for raster images
Ideal Uses: Icons, logos, illustrations, UI elements
File Size: Tiny for simple shapes; increases with complexity
Image Format Comparison Table
| Format | Compression | Transparency | Animation | Ideal Content | Relative File Size |
|---|---|---|---|---|---|
| JPEG | Lossy | No | No | Photographs | Baseline (Largest) |
| PNG | Lossless | Yes | No | Logos, Text, Graphics | Very Large for Photos |
| WebP | Lossy & Lossless | Yes | Yes | Universal Web Images | ~30% Smaller than JPEG |
| AVIF | Lossy & Lossless | Yes | Yes | High Quality Photography | ~50% Smaller than JPEG |
| GIF | Lossless | No | Yes | Simple Animations | Very Large vs Modern Alternatives |
| SVG | Vector | Yes | Yes* | Icons, UI, Logos | Tiny for Simple Shapes |
*SVG supports animation via CSS or SMIL
Image Size vs Resolution: Understanding the Difference
Featured Snippet: Image size refers to the file's byte count determining storage and bandwidth. Resolution refers to pixel dimensions determining display sharpness. High resolution does not guarantee a large file size, and low resolution does not guarantee a small file.
Misunderstanding these terms leads to persistent optimization errors.
Pixels and Dimensions
Pixels are the individual colored dots forming an image. Dimensions describe the pixel grid, written as width × height, such as 1920 × 1080 pixels.
DPI Explained
DPI stands for dots per inch and applies exclusively to printed output:
- A 1200-pixel image set to 300 DPI prints at 4 inches wide
- The same 1200-pixel image set to 72 DPI prints at 16.6 inches wide
Critical point: On any screen, the DPI value stored in metadata has absolutely zero effect on display quality or file size. Pixels are pixels. The image will be rendered at its exact pixel dimensions regardless of DPI settings.
File Size Determination
File size (measured in kilobytes or megabytes) results from the combination of:
- Dimensions (pixel count)
- Compression level (quality setting)
- Format efficiency (JPEG vs PNG vs WebP)
Example: A 1000-pixel JPEG saved at 40% quality might weigh 30KB. A 1000-pixel uncompressed TIFF can weigh 3MB. Both have identical dimensions and identical sharpness. The difference is entirely in compression.
Practical Takeaway
For web work, ignore DPI entirely. Focus exclusively on:
- Pixel dimensions appropriate for your layout
- Compression settings that balance quality and size
- Format selection optimized for content type
Common Mistakes When Optimizing Images
Several errors recur across beginners and experienced developers alike. Recognizing them saves hours of rework.
Double Compression of Lossy Files
Opening a lossy JPEG, editing it, and saving it as a lossy JPEG again compounds artifacts. Each save degrades the image further.
Solution: Always work from a lossless master file (PNG or TIFF) and export the final version only once.
Aggressive Over-Compression
Pushing the quality slider too low creates blocky artifacts, smeared textures, and halos around edges. If facial features look plasticky or product textures turn muddy, the compression is too aggressive.
Solution: Test visually at 100% zoom and compare to the original.
Wrong Format for Content Type
Saving a screenshot containing text as a JPEG introduces fuzzy compression noise around every character. Saving a photograph as a PNG creates an unnecessarily enormous file.
Solution: Use the format decision matrix provided earlier.
Uploading Full-Resolution Originals
Relying on HTML width attributes to shrink a 5000-pixel image down to a 200-pixel thumbnail forces browsers to download the full file.
Solution: Always resize before uploading.
Neglecting Responsive Image Syntax
Delivering a 1600-pixel desktop hero image to a 375-pixel mobile screen wastes significant bandwidth.
Solution: Use the srcset attribute to serve appropriately sized versions.
Leaving Metadata Intact
Publishing photos with embedded GPS coordinates exposes location data. Camera serial numbers and timestamps add pointless kilobytes.
Solution: Strip all metadata before publishing.
Converting JPEG to PNG for "Quality"
Converting a lossy JPEG to a lossless PNG locks in existing compression artifacts permanently and multiplies the file size. This never improves quality.
Solution: Never convert JPEG to PNG. Work from originals.
Ignoring Modern Formats
Continuing to use JPEG and PNG exclusively while WebP and AVIF offer substantial size reductions.
Solution: Adopt modern formats for all new images.
Benefits of Optimized Images
Featured Snippet: Properly optimized images improve page speed, boost search engine rankings through better Core Web Vitals, reduce bandwidth costs, increase user engagement, and drive higher conversion rates on ecommerce stores.
The impact of image optimization radiates outward across every performance and business metric.
SEO and Search Rankings
Google explicitly uses page experience signals including LCP as ranking factors. Smaller images load faster, directly improving LCP scores and helping pages climb search results. In competitive search landscapes, these technical advantages can determine ranking positions.
Faster Loading and Better UX
A page that renders completely in under two seconds keeps visitors engaged. Images that appear instantly create a sense of quality and professionalism. Users form opinions about your brand within milliseconds—make sure those impressions are positive.
Improved Core Web Vitals
Beyond LCP, properly sized images with explicit width and height attributes prevent Cumulative Layout Shift (CLS). Visitors don't experience content jumping around as images load, creating a smoother, more professional browsing experience.
Reduced Bandwidth and CDN Costs
Content delivery networks charge based on data transfer volume. A 60% reduction in total image bytes translates directly into lower monthly infrastructure costs. For high-traffic sites, this can mean savings of hundreds or thousands of dollars annually.
Ecommerce and Conversions
Product images sell products. Slow-loading, blurry, or artifact-ridden photos undermine buyer confidence. Crisp, instantly loading product imagery reduces bounce rates and increases add-to-cart behavior. Every millisecond of load time optimization translates to measurable revenue gains.
Best Practices Checklist
Use this checklist before publishing any visual content.
Before Optimization
- Archive a lossless master copy (PNG or TIFF) before any compression work begins
- Identify the maximum display width for each image
- Determine the appropriate format based on content type
During Optimization
- Resize images to exactly the maximum pixel width your website displays
- Assign the correct format: SVG for icons, PNG for transparent graphics, JPEG or WebP for photographs
- Convert legacy formats to WebP or AVIF for additional savings
- Set quality between 80% and 85% for lossy formats
- Test visually at 100% zoom and adjust quality as needed
- Strip all EXIF metadata, GPS coordinates, and embedded thumbnails
Before Publishing
- Rename files descriptively (replace DSC_0491.jpg with blue-ceramic-coffee-mug.jpg)
- Generate responsive size variants using srcset for mobile and tablet breakpoints
- Apply lazy loading with
loading="lazy"to images below the initial viewport - Add descriptive alt text for accessibility
- Run the page through PageSpeed Insights or Lighthouse to verify LCP scores
- Confirm the page passes Core Web Vitals assessment
Frequently Asked Questions
1. How can I reduce image size without losing quality?
Resize the image to the required display dimensions, convert to a modern format like WebP or AVIF, and apply perceptually lossless compression at approximately 80% to 85% quality. This strips unnecessary data while preserving visual appearance.
2. Does compressing images reduce quality?
Lossless compression preserves all quality perfectly. Lossy compression removes data, but properly configured settings discard only imperceptible details, so the result looks identical to viewers.
3. Which image format has the smallest size?
For photographs, AVIF achieves the smallest file sizes at a given quality level. WebP provides a close second with broader browser support.
4. Is WebP better than JPEG?
Yes. WebP files are 25% to 35% smaller than JPEG files at the same visual quality and also support transparency and lossless modes.
5. Can I compress images on my phone?
Yes. Many mobile apps and browser-based image compressors allow you to resize and compress photos directly before uploading.
6. How much can an image be compressed?
A typical JPEG can be reduced by 50% to 80% without visible quality loss by adjusting quality settings and removing metadata. PNG graphics converted to lossless WebP often shrink by 40% to 60%.
7. Why are my photos so large?
Modern smartphone and camera sensors capture images at very high pixel resolutions and embed extensive metadata including GPS, camera settings, and thumbnails. These files are optimized for editing, not web delivery.
8. Is PNG better than JPEG?
PNG is better for graphics with text, sharp lines, or transparency. JPEG is dramatically better for photographs. Using the wrong format creates either poor quality or unnecessarily huge files.
9. What is the best image format for websites?
A combination strategy works best. WebP serves as the default for photos and graphics. AVIF provides premium quality when needed. SVG handles icons. JPEG remains available as a legacy fallback.
10. Does image compression improve SEO?
Yes, indirectly. Compression improves page load speed, which directly affects Core Web Vitals scores and therefore Google rankings.
11. How do I compress a JPEG without ruining it?
Start from the original uncompressed file, resize to the needed dimensions, and export at 80% to 85% quality. Never re-compress an already compressed JPEG.
12. What is the difference between resizing and compressing?
Resizing changes pixel dimensions, reducing the total number of pixels. Compressing changes how the existing pixel data is encoded to reduce the byte count. Both are essential.
13. Can I compress WebP images further?
Yes. You can lower the quality setting within acceptable visual limits, remove metadata, reduce dimensions, or re-encode to AVIF for additional savings.
14. What is perceptually lossless compression?
Compression that removes data the human visual system cannot detect. The file is technically lossy, but a human observer sees no difference from the original at normal viewing distances.
15. Does converting JPEG to PNG improve quality?
No. Converting a lossy JPEG to a lossless PNG locks in the existing compression artifacts permanently and multiplies the file size. This should be avoided.
Conclusion
Reducing image size without losing quality is a learnable skill built on understanding compression principles, format selection, and dimension control. The workflow remains consistent:
- Preserve a lossless master
- Resize to exact display requirements
- Select the right modern format
- Strip unnecessary metadata
- Dial in the quality sweet spot where compression delivers small files but human eyes detect no degradation
Applying these steps systematically makes your website faster, your visitors happier, and your search rankings stronger.
The techniques covered in this guide give you complete control over your image optimization workflow. Whether you're handling a single hero image or processing thousands of product photos, these principles ensure every image delivers maximum visual impact with minimum bandwidth cost.
Speed and aesthetics are not opposing forces. With the right knowledge and consistent application of these methods, you achieve both without compromise.
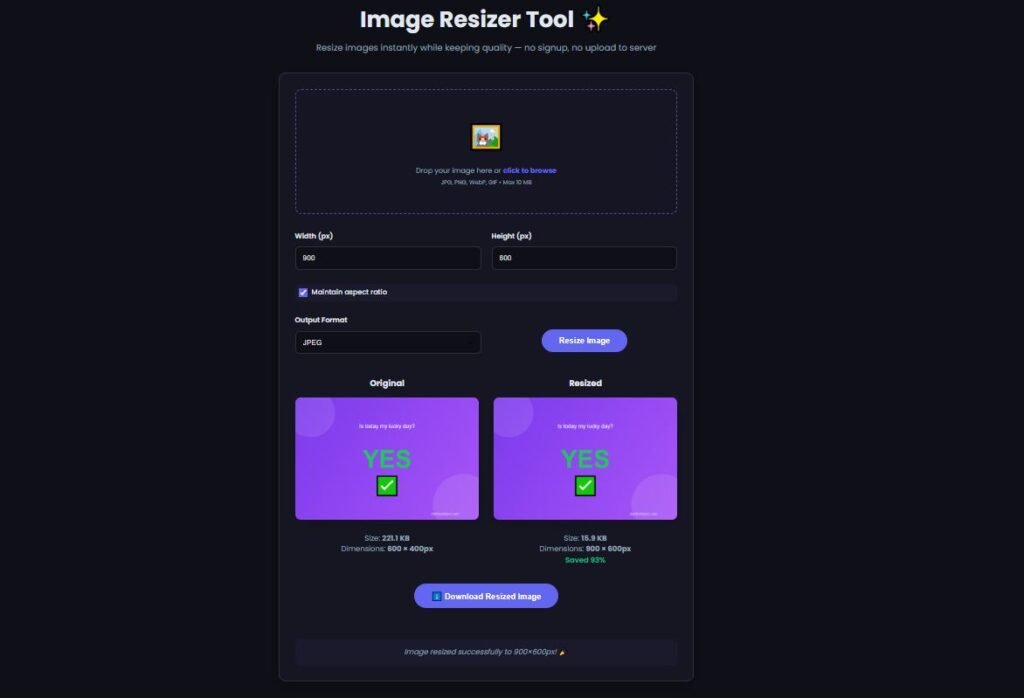
Want to compress images without manually adjusting settings for every file? Our free image compressor automates the entire workflow—resize, reformat, and compress multiple images simultaneously while preserving the visual quality your brand depends on.
Other tools you might find useful:
- Image Converter – Convert PNG to WebP, JPEG, or other formats
- Image Resizer – Reduce dimensions before compression
- Image Cropper – Focus on key areas before saving
- PNG to JPG – Convert when JPEG is the better choice
- PDF Compressor – For PDF document optimization
Further Reading:
- Google Developers: Image Optimization — Official guide on optimizing images for the web from Google's Web Fundamentals team.
- MDN Web Docs: Image File Types and Formats — Comprehensive technical reference for all image formats from Mozilla.
- Squoosh — An interactive tool from Google Chrome Labs for testing compression settings visually.
These authoritative resources provide additional technical depth and practical demonstrations for image optimization.
Share this article 👇


0 Comments