
Table of Contents
What Does It Mean to Compress a JPG?
JPG compression reduces the file size of a JPEG image by removing or reorganizing data. The goal is simple: make the file smaller so it loads faster, takes up less storage, and transfers more quickly across networks.
When you compress a JPG, you're asking the computer to find ways to represent the same visual information using fewer bytes. The challenge—and the art of good compression—is doing this without making the image look noticeably worse.
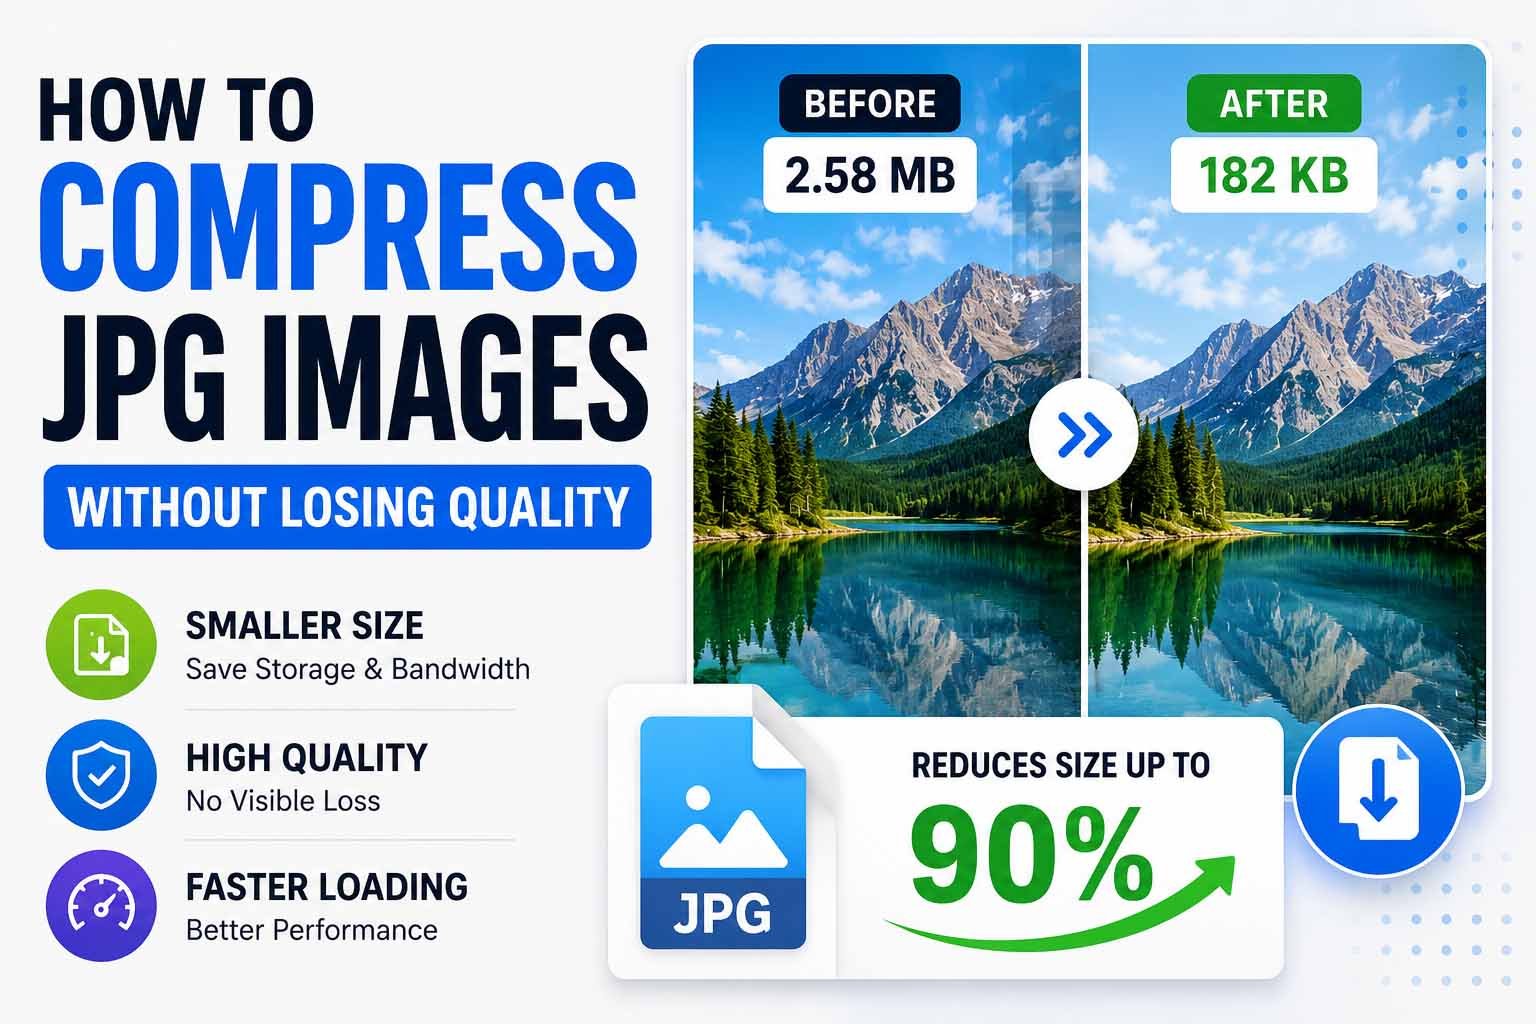
A typical photograph taken with a modern smartphone might be 8 to 12 megabytes. After proper compression, that same image can drop to 200 to 500 kilobytes while still looking identical to the human eye. That's a reduction of 90% or more, and it transforms how that image performs on the web. Use MiniToolsPro Image Compressor Tool for real-time results.
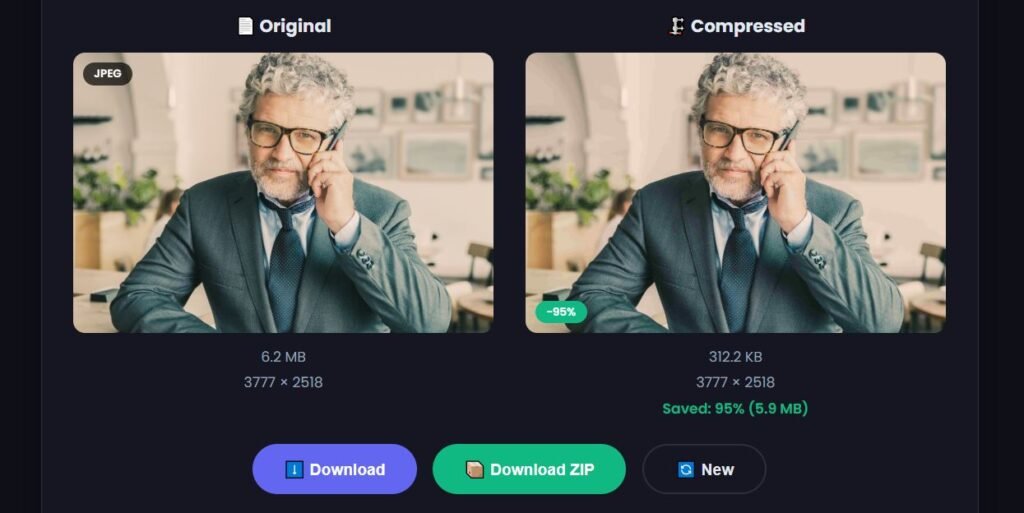
The process isn't magic. It's based on how the JPG format was designed and how human vision works. Understanding both helps you make better decisions about your images.
Why JPG Compression Matters
Every time someone visits your website, their browser downloads every image on the page. The heavier those images are, the longer the page takes to load. This affects everything from user experience to search rankings.
Page speed is the most obvious reason. A 10-megabyte hero image adds ten seconds of load time on a typical mobile connection. That's ten seconds of waiting before anyone sees your content. Most visitors won't wait that long.
Storage costs add up when you're managing hundreds or thousands of images. Hosting providers charge for storage and bandwidth. Reducing file sizes by 70-80% means paying less each month.
Search engine rankings now depend heavily on Core Web Vitals. Largest Contentful Paint (LCP) measures how quickly your main content loads. Oversized images are the number one cause of poor LCP scores.
Mobile users face data caps and slower connections. A compressed image that's 300KB instead of 3MB makes a real difference to someone on a limited data plan.
Email attachments have size limits. Many email providers cap attachments at 20-25MB. Compressing images before attaching them saves you from failed sends and bounced messages.
Every kilobyte you save improves the experience for your visitors. That's why understanding how to compress JPG images properly is worth learning.
How JPG Compression Actually Works
JPG compression is more sophisticated than simply removing pixels. The format uses a process called the Discrete Cosine Transform (DCT) to analyze the image and decide what can be safely discarded.
Here's what happens when you compress a JPG:
- The image is divided into 8x8 pixel blocks. Each block is analyzed separately.
- Color space conversion occurs. The image moves from RGB (red, green, blue) to YCbCr (luminance, blue chrominance, red chrominance). Human eyes are much more sensitive to brightness than to color, which becomes important in the next step.
- Chrominance information is reduced. Because we can't see color differences as clearly as brightness differences, the compression algorithm stores less color data. This is called chroma subsampling.
- Frequency information is transformed. The DCT converts the pixel data into frequency data. Low frequencies represent smooth areas like skies and skin. High frequencies represent sharp edges and fine details.
- High-frequency data is discarded. The compression algorithm keeps the low-frequency data and discards the high-frequency data according to the quality setting you choose. A higher quality setting keeps more high-frequency data.
- The remaining data is compressed further. The simplified frequency data is then encoded using a form of compression called Huffman coding, which removes redundancy from the final file.
This process is why JPG compression can reduce file sizes so dramatically. It exploits the limitations of human vision to remove information you won't miss.
Lossy vs Lossless JPG Compression
JPG is fundamentally a lossy format, but there are ways to apply compression without permanent quality loss. Understanding the difference helps you choose the right approach.
Lossy JPG Compression
Lossy compression is what most people mean when they say "compress a JPG." Data is permanently removed from the file. You cannot recover the original image from a lossy-compressed JPG.
Advantages:
- Dramatic file size reduction (50-90%)
- Widely supported across all platforms
- Fast encoding and decoding
Disadvantages:
- Permanent quality loss
- Artifacts become visible at high compression levels
- Repeated saving degrades quality further
Lossless JPG Compression
Lossless JPG compression preserves every pixel of the original image while still reducing the file size. It works by reorganizing how the data is stored rather than removing any information.
Advantages:
- Perfect quality preservation
- Reversible (you can restore the original)
- No artifacts or degradation
Disadvantages:
- Much smaller file size reductions (10-30%)
- Limited tool support
- Not as efficient as lossy methods
For most web use cases, lossy compression at the right quality setting is the better choice. The file size savings outweigh the minimal quality loss. For archival purposes or images that will be edited repeatedly, consider keeping a lossless master copy alongside the compressed version.
Comparison Table
| Feature | Lossy JPG | Lossless JPG |
|---|---|---|
| File Size Reduction | 50-90% | 10-30% |
| Quality Preservation | Reduced (perceptually lossless possible) | Perfect |
| Reversible | No | Yes |
| Artifacts | Possible at high compression | None |
| Best For | Web images, photos, sharing | Archives, medical imaging, editing |
How to Compress JPG Images (Step-by-Step)
Here's a straightforward process you can follow to compress JPG images while maintaining good quality. You can use any image editor or online tool—the principles are the same.
Step 1: Start With the Original File
Always begin with the highest quality version of your image you have. If you've already compressed the image before, starting from that version will compound artifacts. Work from the original camera file or the highest resolution version you can access.
Step 2: Resize to Your Display Dimensions
Before you compress, consider whether the image needs to be at its current resolution. If you're displaying the image at 800 pixels wide on your website, there's no reason to keep a 6000-pixel original.
Resize the image to the maximum width it will be displayed at. This is often the most impactful step, as reducing pixel dimensions reduces file size exponentially.
Step 3: Choose Your Quality Setting
This is where the real compression happens. Most tools offer a quality slider from 1 to 100 or a percentage. The key is finding the balance where the file is small enough but the image still looks good.
For most photographs, a quality setting between 70% and 85% is optimal. The image looks nearly identical to the original at 100%, but the file size is often half or less.
Here's a rough guide to quality settings:
| Quality Setting | File Size Reduction | Visual Quality | Best Use |
|---|---|---|---|
| 90-100% | 0-20% | Excellent | Archives, print, high-end photography |
| 80-90% | 30-50% | Very good | General web use, portfolios |
| 70-80% | 50-70% | Good | Blog posts, social media, ecommerce |
| 60-70% | 70-80% | Acceptable | Thumbnails, bulk archiving |
| Below 60% | 80-90% | Poor | Avoid unless necessary |
Step 4: Strip Metadata
Camera settings, GPS coordinates, and other metadata don't serve a purpose on the web. Removing them can shave off 100-500KB without affecting image quality. Most compression tools offer this as an option.
Step 5: Preview and Test
After compression, view the image at the size it will appear in your final use case. Don't zoom in to 400% to look for artifacts—that's not how your visitors will see it. Check for visible artifacts at normal viewing distance and adjust the quality setting if needed.
Step 6: Save With a New Name
Never overwrite your original file. Save the compressed version with a new name so you can always go back to the original if you need to.
Best JPG Compression Settings for Different Uses
Different situations call for different compression approaches. Here's a breakdown of recommended settings for common use cases.
Website Hero Images
Hero images are often the first thing visitors see. They need to be visually impressive and load quickly.
- Quality setting: 75-85%
- Maximum width: 1600-1920 pixels
- Metadata: Remove all
- Resulting file size: 150-300KB
Product Photography
Ecommerce images need to show products clearly but don't require perfect quality. Customers care about seeing the product, not pixel-perfect detail.
- Quality setting: 70-80%
- Maximum width: 800-1200 pixels
- Metadata: Remove all
- Resulting file size: 50-150KB
Blog Post Images
Images in blog posts should support the content without slowing down the page. Lower quality is often acceptable.
- Quality setting: 65-75%
- Maximum width: 800-1000 pixels
- Metadata: Remove all
- Resulting file size: 30-80KB
Social Media Sharing
Social media platforms compress images anyway, so there's no point uploading huge files. Compress them heavily before uploading.
- Quality setting: 60-70%
- Maximum width: 1200 pixels (or the platform's recommended size)
- Metadata: Remove all
- Resulting file size: 50-100KB
Email Attachments
Email size limits make compression essential. Balance quality against attachment size.
- Quality setting: 70-80%
- Maximum width: 800-1200 pixels
- Metadata: Remove all
- Resulting file size: 100-200KB per image
Archival Storage
For long-term storage, you want the best quality possible while still saving space. This is where lossless compression shines.
- Quality setting: Lossless (if available) or 90-95%
- Maximum width: Original resolution
- Metadata: Keep if needed
- Resulting file size: 50-70% of original
Common JPG Compression Mistakes
Even experienced designers make these mistakes. Recognizing them helps you avoid common pitfalls.
Compressing Already Compressed Files
Opening a JPG, saving it again with more compression, and repeating this process compounds artifacts. Each save degrades the image further. Always compress from the original.
Using 100% Quality
Many people default to 100% quality because they think it preserves all detail. A JPG at 100% quality is still lossy—it's not the same as a lossless file. The file is often twice as large as an 85% quality version with no visible difference. You're wasting space.
Choosing the Wrong Resolution
Uploading a 6000-pixel image and relying on CSS to shrink it to 300 pixels means your visitors download 20 times more data than necessary. Always resize to actual display dimensions.
Ignoring Metadata
Every image you upload has metadata attached. Camera model, lens, focal length, exposure settings, GPS coordinates, and more. None of this serves a purpose on the web, and it adds up to 500KB of waste per image.
Converting JPG to PNG for Better Quality
Converting a JPG to PNG doesn't restore lost quality. It locks the artifacts in place and increases file size dramatically. Work from the original file, or don't use PNG for photographs.
Saving JPG as a Working File
JPG should be your final output format, not your working file. Edit and save in a lossless format like PSD or TIFF, then export the final version as JPG. This prevents compounding artifacts.
JPG vs Other Image Formats
JPG is one of several image formats, and it's not always the right choice. Understanding when to use JPG and when to use alternatives helps you make better decisions.
JPG vs PNG
PNG is a lossless format designed for graphics, not photographs. It preserves every pixel perfectly and supports transparency. For photographs, JPG offers better compression. For screenshots, logos, and text-heavy images, PNG or WebP is usually better.
JPG vs WebP
WebP is a newer format that offers 25-35% better compression than JPG at the same quality level. It also supports transparency and animation. The only downside is that older browsers lack support, though over 97% of current users have WebP-compatible browsers.
JPG vs AVIF
AVIF is the next generation image format with even better compression than WebP. It can reduce file sizes by 50% compared to JPG while maintaining similar quality. Browser support is growing rapidly but is not yet universal.
JPG vs SVG
SVG is a vector format for graphics, not photographs. It can scale infinitely without quality loss and produces tiny file sizes for simple graphics. For photographs, SVG isn't suitable.
Which Format Should You Use?
Here's a simple decision guide:
- Photographs on the web: WebP or AVIF (with JPG as fallback)
- Photographs for compatibility: JPG
- Logos and icons: SVG or PNG
- Screenshots: PNG or WebP
- Images with text: PNG or WebP
- Animated images: Animated WebP or silent MP4
Frequently Asked Questions
1. What is the best quality setting for JPG compression?
For most web images, a quality setting between 70% and 85% offers the best balance between file size and visual quality. The exact sweet spot depends on the image content—simple images with smooth gradients can go lower, while detailed images may need higher settings.
2. Does compressing a JPG reduce its quality permanently?
Yes. JPG is a lossy format, meaning data is permanently removed during compression. Once you save a JPG with compression, you cannot recover the lost data. This is why you should always compress from the original file.
3. Can I compress a JPG without losing quality?
You can apply lossless compression to a JPG, but the file size reduction is much smaller (10-30%). For meaningful size reduction, lossy compression is required. The goal is perceptually lossless compression—where the quality loss is invisible to the human eye.
4. How much can I reduce a JPG file size?
A typical JPG can be reduced by 50-80% without visible quality loss. In some cases, reductions of 90% are possible for simple images. The exact amount depends on the image content and the quality setting you choose.
5. Why does my JPG look blurry after compression?
Blurriness after compression usually means the quality setting was too low. High-frequency details like sharp edges and fine textures are the first to be removed during compression. Try increasing the quality setting by 5-10% and test again.
6. What's the difference between resizing and compressing a JPG?
Resizing changes the pixel dimensions of the image (width and height). Compression changes how the pixel data is encoded to reduce the file size. Both actions reduce file size, and they work best when used together.
7. Is JPG lossy or lossless?
JPG is primarily a lossy format. There are lossless modes in the JPG standard, but they are rarely used in practice. The format was specifically designed for lossy compression of photographs.
8. How do I compress a JPG on my phone?
Most phones have built-in compression when sharing images. You can also use mobile apps like Photo Compressor or web-based tools. The MiniToolsPro Image Compressor works on mobile browsers as well.
9. Does JPG compression affect color?
Yes, indirectly. JPG compression uses chroma subsampling, which reduces color information. This is usually invisible because human eyes are less sensitive to color changes than brightness changes. At very high compression, color banding and shifts can become visible.
10. Should I compress JPG before uploading to WordPress?
Yes. WordPress has some built-in compression, but it's better to compress images before uploading. This gives you more control over the quality setting and ensures you're not wasting server resources on large uploads.
11. Does repeated JPG compression make it worse?
Yes, every time you open and save a JPG with compression, more data is discarded. The artifacts from previous compressions also become more apparent. Always start from the original file when compressing.
12. What is chroma subsampling in JPG compression?
Chroma subsampling is a technique where color information is stored at a lower resolution than brightness information. Because human eyes are less sensitive to color, this reduces file size with minimal visual impact. Most JPG compression uses 4:2:0 subsampling.
13. Is WebP better than JPG for compression?
Yes, WebP typically offers 25-35% smaller file sizes than JPG at the same visual quality. WebP also supports transparency and lossless compression. The only consideration is browser support, though it's now at 97% globally.
14. How do I compress a JPG without losing detail?
To preserve detail, use a higher quality setting (80-85%), avoid aggressive chroma subsampling, and only compress once from the original file. If you need to preserve every detail, consider using a lossless format like PNG for the final output.
15. Can I restore quality from a compressed JPG?
No. Once data has been discarded during lossy compression, it cannot be restored. This is why it's essential to keep your original files. Any tool that claims to "restore" JPG quality is applying sharpening or upscaling, which doesn't recover lost data.
Related Image Compression Guides
JPG compression requires balancing file size against visual quality because JPG uses lossy compression. For a broader explanation of compression, see our Image Compression Explained guide. You can also compare JPEG vs PNG file size, learn about image compression formats, or explore our complete Image Compression Guide.
Key Takeaways
Compressing JPG images is one of the most effective ways to improve website performance, reduce storage costs, and deliver better user experiences. The principles are straightforward:
- Start from the original file. Never compress an already compressed JPG.
- Resize before you compress. Remove unnecessary pixels before applying compression.
- Choose the right quality setting. For most uses, 70-85% is the sweet spot.
- Strip metadata. Remove camera data, GPS, and other unnecessary information.
- Test your results. View the image at normal size before publishing.
- Consider modern formats. WebP and AVIF offer better compression than JPG for web use.
These practices transform how your website performs. Pages load faster, visitors stay longer, and search engines rank you higher. The best part is that once you establish a workflow, compressing images takes seconds per file.
If you're compressing multiple images, manually adjusting settings for each one becomes tedious. The MiniToolsPro Image Compressor automates the entire workflow. Upload your JPGs, choose your settings, and download compressed versions ready for the web. No software to install, no complex settings to navigate.
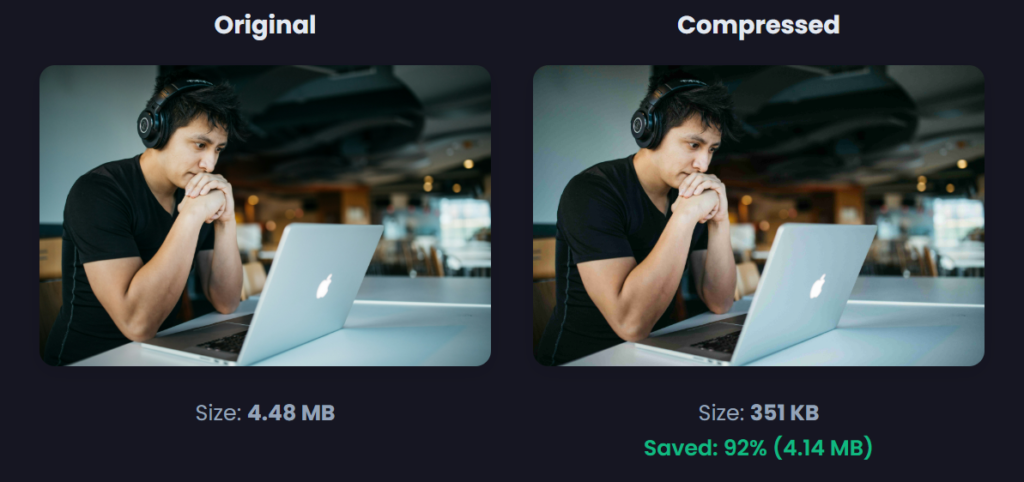
Speed and quality aren't tradeoffs. With the right approach to JPG compression, you achieve both.
Further Reading:
- Google Developers: Image Optimization — Official guide on optimizing images for the web from Google's Web Fundamentals team.
- MDN Web Docs: Image File Types and Formats — Comprehensive technical reference for all image formats from Mozilla.
- Squoosh — An interactive tool from Google Chrome Labs for testing compression settings visually.
These authoritative resources provide additional technical depth and practical demonstrations for image optimization.
Share this article 👇


0 Comments